|
|
|
|
|
||
|
|

Welcome to Centerpoint, and Learning Nendo!
I must admit now that I've only been doing 3D modelling for about a week,
but with Nendo, Nichimen Graphics' incredible new 3D graphics tool, I'm
able to model with no difficulty whatsoever. There is no learning
curve. If you don't have Nendo yet, you can get the demo version,
which is fully functional but doesn't export or import files, in the downloads
section, or by clicking here.
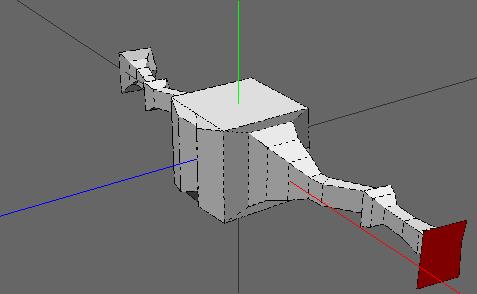
In this tutorial, we will make a 3 dimensional model of something I call an Eyeguy, which you can see pictured above, but first, let's talk. The only thing you need for this tutorial is Nendo, in full or demo version, *BUT*, for some of you who might like to see the eyeguy actually being built, I recorded a Nendo Demo Script, which you can play by clicking on 'Help > How to' in Nendo and which you can download in the download section or here. It's small, only about 15k, so it should take almost no time to get. Besides letting you see the Eyeguy built before your very eyes, the demo also gives you the added advantage of letting you actually count every single mistake I made. (Hey, I'm new to the field.) ;-)
Unfortunatley, while I was recording the demo, Nendo crashed. (OOPS!) What that means for you is that the demo is incomplete, and will probably also cause YOUR Nendo to crash, but only if you let it play to the end, otherwise, you're fine. Fortunately, it crashed right near the end, when the only thing left to make was the eye, which I think would've been the most boring part of the demo to watch, anyway, and should also be the most interesting part to do yourself, since it involves creating a second object and integrating it seamlessly into the main 'body' in a certain way that involves some new techniques. If you use the demo, you can pick up where it left off here.
Remember, I'm new, so if something I did looks stupid, assume that it is. It was late and I was tired. If you think you know how it could be done better, speak up, and write your own tutorial.
Oh yeah, and don't forget to SAVE OFTEN!
Okay, that's it, so let's begin.
When an the mouse is over an item, the item will highlight green. When the mouse is over a selected item, it will highlight yellow. When an item is selected, but the mouse isn't over it, it will be red. To deselect an item, click on it again. To deselect ALL items, hit spacebar.
Of course, there are other tools, but in Nendo's very smart interface, they are context-sensitive and available in menu that you can bring up with a right-click.
From now on, instead of 'Right-Click' I'm just going to say (Click-R) for short. Nendo has many useful tools, and I'll try to include descriptions of these in this tutorial.
So you've got it? The selection tools are available in the menu bar at the top of the Nendo window, and the other tools are available by right-clicking. Let's build.
Open Nendo (if you STILL haven't done that.) Under the 'View' menu, turn 'Ground Plane' off and 'Axes' on.
Right-click anywhere in the window and choose 'Cube' from the short menu which pops up to create a cube.
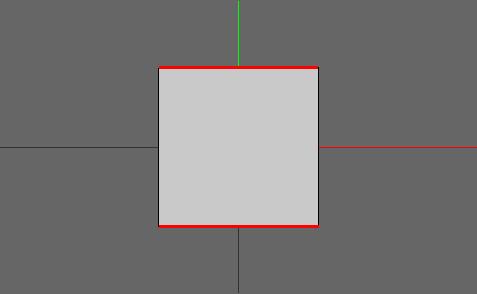
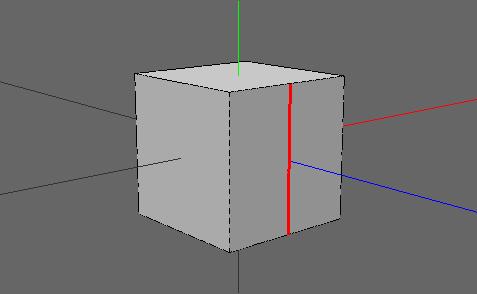
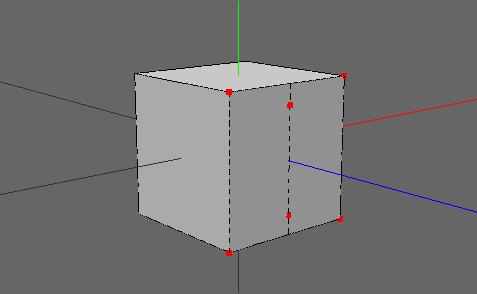
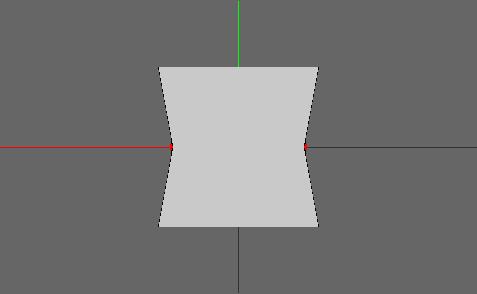
Hit the z hotkey to automatically move the camera so you see the cube down the z axis. You should see a square, which is really one face of the cube. Select the top and bottom edges of the face, as shown below, (Click-R) and choose 'Connect' to create a new vertical edge dividing the face into two equal faces.
Select the edge that you have just created,
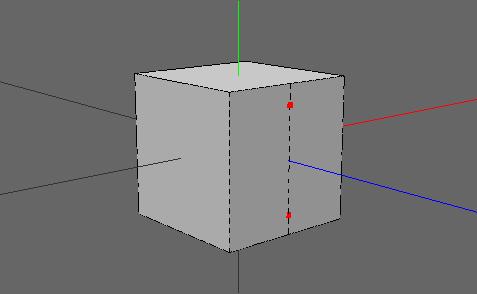
(Click-R) and choose Cut > 3 to divide it into 3 equal parts.
Select the two vertices you have just made. (Click-R) and choose Scale > Y and move the mouse to move the two vertices away from each other.
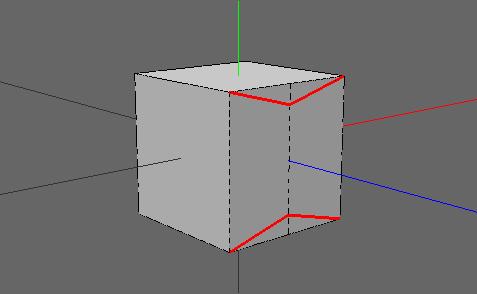
Select the vertices shown below, and connect them.
You have just created four new edges. Select them, and hit Connect.
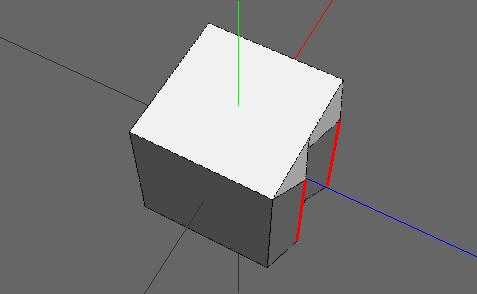
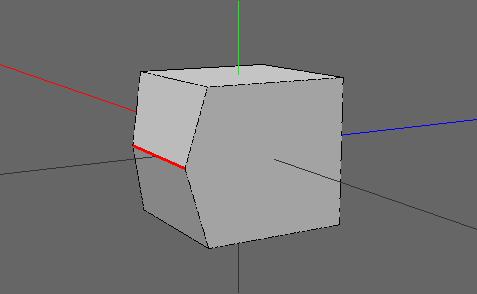
Select the two new edges, and choose Move > Z to move them out a little as shown below.
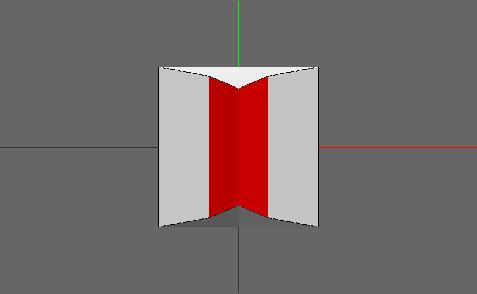
Select the two faces between the edges you've just moved, shown below, and choose Scale > X to make them thinner.
Okay, now let's work on the back. Hit Shift+Z to switch to the opposite side of the object. You should see a square again. This time select only the side edges, and Cut > 2. Now select the two new vertices and choose Scale > X and drag them closer together.
With the two vertices still selected, choose Connect. Select them new edge and Move > Z to move it out a bit.
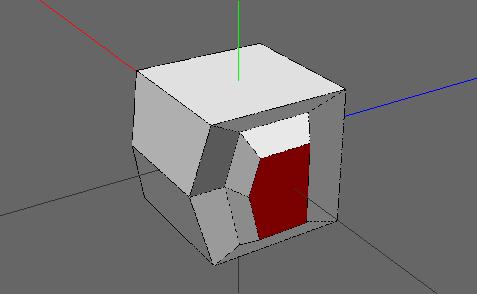
Hit x to change to the X axis, and select the large, house-shaped face. Leave it selected, hit Shift+x and select the corresponding face on the opposite side. (Click-R) and choose Inset. Move the back and forth mouse to change the size of the inset face.
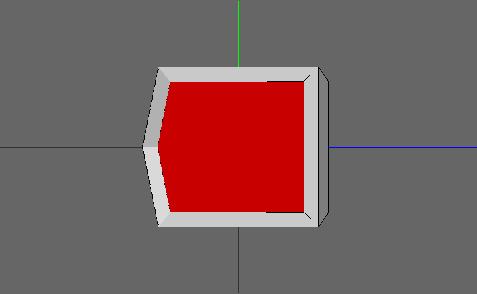
With the two faces still selected, (Click-R) and choose Scale > Z to make the faces thinner.
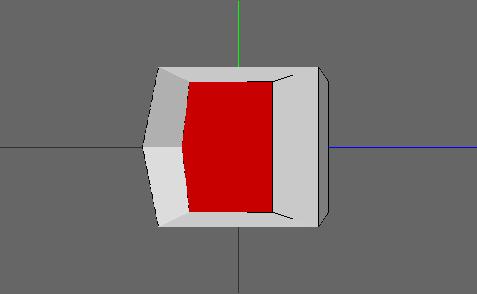
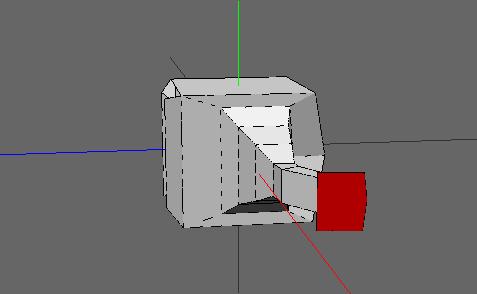
With the two faces still selected, (Click-R) and choose Extrude > Normal to extrude the face a bit, then Choose Scale > Uniform and shrink them a little. When you're done, they should look like this:
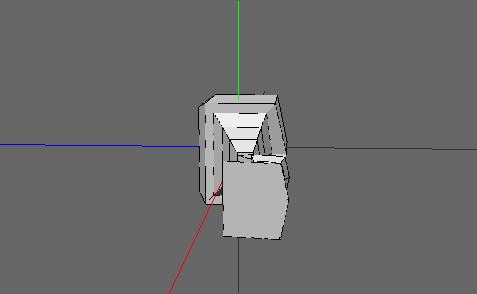
Repeat this 2 times. When you finish, it should look something like in the picture below.
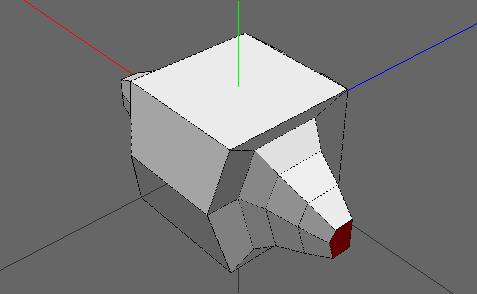
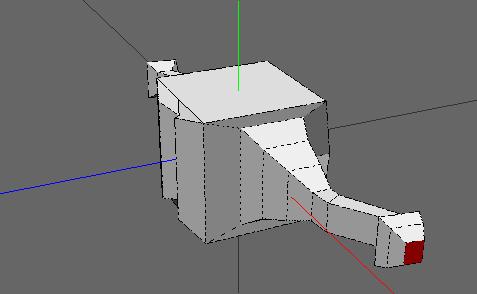
Without changing the selection, extrude another small piece, and then (Click-R) and choose Rotate > Y and rotate it a little.
Extrude a bigger piece, then choose Rotate > Y and rotate the face a bit in the other direction.
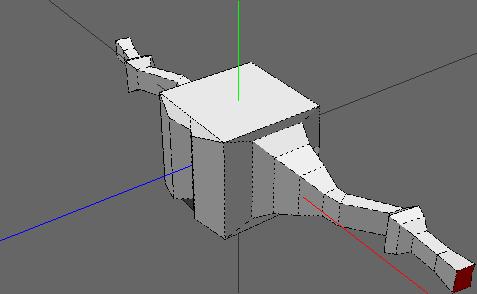
Extrude another little bit, then choose Scale > Uniform and enlarge it. This will be part of the 'knee'. Now choose Scale > y and make it less tall.
Extrude a little bit and choose Scale > Uniform to shrink it. Repeat. Your model should now look like this:
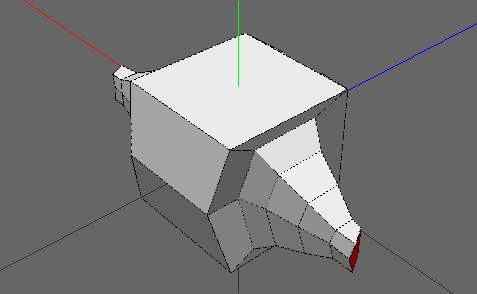
Extrude a slightly larger piece. Leave it as it is and extrude another piece about the same size. Use Scale > Uniform and enlarge it a bit.
Extrude another, smaller, piece, and scale it down, then extrude another piece, but scale it up. This will be the 'hand'
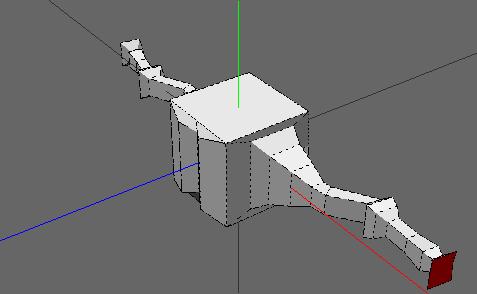
Extrude an even smaller piece, and scale it up much more. This is the hand. You are now finished with the arms. If you want, you can add more detail. For example, by extruding the edges or the vertices on the hand, you could create fingers. Be creative, the possibilities are endless. Your model should look like this:
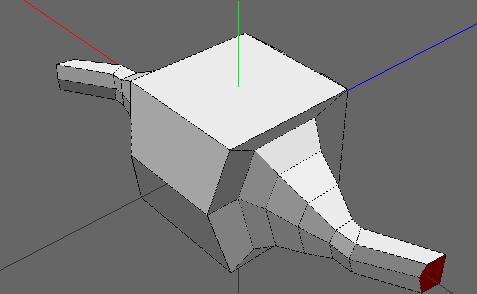
Hit spacebar to release your selection. Now hit Shift+z and select the 6 vertices shown below. Use Move > Z to move them inward a little.

Release your selection with spacebar. Hit Z and select the vertices shown below. Move them with Move > Z so they are closer to the beginning of the arms.
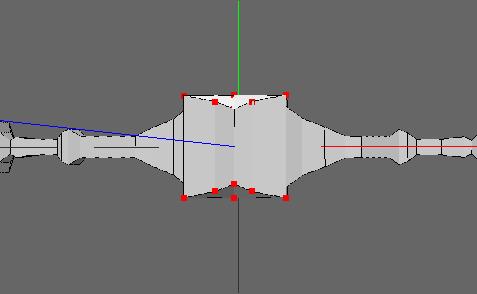
Seen from the X axis, your model should look like this: